Customizing Your Workspace In Photoshop For Improved Productivity And Efficiency – Stepping into your Photoshop workspace can feel like stepping into a whole new world. It’s easy to feel overwhelmed when there are so many tools and options at your fingertips.
Learn how to efficiently set up your workspace, explore key features, and get helpful tips to streamline your workflow.
Customizing Your Workspace In Photoshop For Improved Productivity And Efficiency
Whether you’re a beginner or looking to hone your skills, you’ll find valuable information to increase your creativity and productivity.
Free Photoshop Full Course Tutorial 18+ Hours
The magic begins in Adobe Photoshop’s default workspace. It’s been carefully designed to give you easy access to important Photoshop tools, as well as important Lightroom tools and features.
The toolbar is on the left and is your primary resource for creating and editing. There are selection tools, brushes, etc.
In the toolbar, content recognition tools stand out as powerful features for editing. This tool helps you seamlessly remove or replace parts of images, improving your workflow.
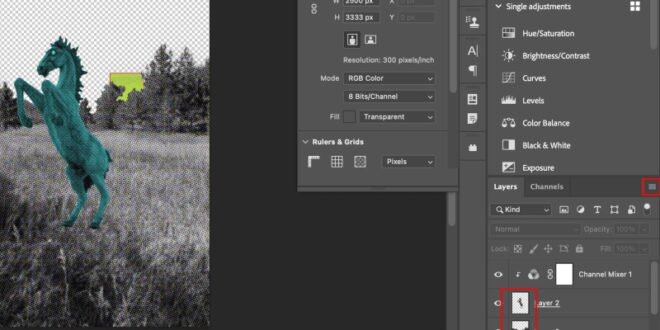
Panels and menus such as the Layers, Colors, and History panels are on the right by default. Panels can be rearranged to suit your work style.
Photoshop Interface And Tools
On the right, panels such as layers, channels, and paths are grouped together for easy access. Grouping allows you to organize your interface while ensuring ease of use.
Understanding how to use these panels effectively will greatly improve your workflow. To manage groups, simply drag them around or into empty slots.
There’s creative space within the central document window. Docking floating document windows is optional and can be left free or docked.
The Swatches panel in Adobe Photoshop is an essential tool for efficiently managing colors in your painting workspace.
Optimize Performance Photoshop
The Swatches panel, located by default on the right, lets you save frequently used colors for quick access.
By customizing the Swatches panel, you can create a color palette that perfectly fits your project’s needs.
Easily add, remove, and arrange colors in the Swatches panel to streamline your workflow and ensure consistency in your designs.
Whether you’re adjusting hues or choosing new tones, the Swatches panel is important to maintaining an efficient and organized painting workspace.
Optimize Your Workflow In Photoshop: Tips And Tricks
Create a custom workspace to suit your needs. You can start from scratch or modify existing panels.
Add panels using the Window menu or switch between them using the Workspace drop-down menu. Saving your new workspace ensures that your changes are not lost.
Adjusting these preferences can make Photoshop more intuitive, such as setting custom keyboard shortcuts to speed up tasks or choosing colors for the interface that are easier to read.
Many new users miss these, but preset workspaces allow you to jumpstart your projects. Switching between photos, graphics, and the web is time-saving and very practical. If you want to experiment with custom settings, use the Window menu efficiently.
Best Photoshop Keyboard Shortcuts For Graphic Designers: Improve Your Workflow
You can easily hide and show hidden panels by remembering to press tab. This will temporarily organize your workspace.
Customizing your Photoshop workspace can save you time. A personalized workspace gives you easy access to the tools you use most, so you don’t have to worry about searching or poking around.
Start with the Window menu. Open it and organize your board layout. Drag the panel to the desired location.
It is important to get the panel layout correct. For example, store color panels and swatch panels together. Useful when playing with different tones.
Boost Your Business Success With Custom Software Solutions
Default brush settings panel? Always within reach. You’ve come up with the idea of organizing the things you do most often.
Pro tip: Get familiar with hotkeys for tools you use frequently. It’s a huge time saver. Additionally, dynamic learning helps shortcuts stick.
Also, understanding the differences between Photoshop and Lightroom will help you decide which software is best for your editing needs.
Use keyboard shortcuts for frequently used tools. Save time and work faster in Photoshop. For example, mastering Photoshop’s essential tools will greatly improve the efficiency of your workflow.
How To Use Adobe Bridge For Photographers
Consider investing in quality tutorials. We can provide additional tips and tricks that may not be obvious at first glance. T
Pro tip: Frequently used menu items at the top of the panel menu. Browsing will be faster.
Customizing your panels is the secret to speeding up your workflow. Imagine not having to constantly search for this tool.
Now, your favorite tools will always be available every time you use this workspace in Photoshop.
Pro Techniques: Optimizing Photoshop Workflows For Pros
Improved workflow leads to increased productivity. It’s not just about keeping things tidy. To save time, you need everything at your fingertips.
Pro tip: Add the panels you use most to a new workspace. We call this the “most commonly used tool.” Save clicks, streamline processes, and reduce headaches.
That way, whether you’re editing photos or creating graphics, your tools are always available and easy to find.
In conclusion, customizing your Photoshop layout using the Window menu is not only convenient, but essential for an efficient and easy-to-use Photoshop user interface.
How To Set Up A Collaborative And Productive Workspace
Access and organize panels as you need them, taking the guesswork out of it and making it easier to focus on your creative projects.
To improve your Photoshop efficiency, it is essential to become familiar with the various elements such as the Brushes panel, Image window, and Histogram panel.
Start by customizing your workspace and giving it easy access to tools like the browser panel and saved workspaces.
Use the double arrow buttons to switch between different views and press Ctrl for a quick shortcut. If necessary, reset basic settings to default settings to quickly return to a clean slate.
Julieanne Kost’s Blog
By mastering these features and understanding how they interact, you can streamline your workflow and get the most out of every editing session.
When using Photoshop, organizing your toolbars can help you work faster. Drag and drop frequently used tools to the top of your dashboard.
This reduces the need for travel and saves time. Also, hide tools you rarely use to keep your workspace tidy. For critical workspaces, this customization increases efficiency.
When organizing your toolbars, don’t forget about the frame tools. This is essential for creating placeholders and managing layout.
Photoshop Workspace: Customizing Your Ideal Setup
Integrating this tool into your workflow will streamline your design process and make it easier to tweak and improve your images.
Managing multiple workspaces in Photoshop is essential for managing different projects. Create new task windows in Photoshop for specific tasks, such as photo editing or graphic design.
You can toggle these settings using the window’s workspace menu. This method adjusts your workspace to fit your current task. If you make changes, save them with a new workspace name for easy access.
Pro tip: Customize the dialog box settings to speed up the process. Adjusting dialog boxes frequently can save time and reduce frustration.
Customizing Your Workspace In Photoshop
By optimizing your dialog box settings, you can make every aspect of your work as smooth and effective as possible.
By becoming familiar with Photoshop’s toolbars, you’ll quickly gain access to a variety of features to improve your workflow.
Photoshop workspace refers to the layout and display of panels, tools, and menus in the Photoshop program. nIt’s designed to help you efficiently manage and access the tools and features you need for your projects.
Photoshop’s workspace menu is located in the upper right corner of the screen. Look for a drop-down menu with the name of your current workspace, or an icon that looks like a series of small squares. n This menu allows you to switch between different workspace configurations.
How To Customize Your Lightroom Workspace For Better Workflow
In conclusion, getting familiar with the Photoshop workspace will make a huge difference in the way you edit your photos. I find that setting up my workspace to match my style saves me a lot of time and makes the process more enjoyable.
For more detailed guides, check out my Photoshop and Lightroom courses. If you’re ready to dig deeper into Photoshop or Lightroom, you can also consider Adobe Photoshop and Adobe Lightroom options.
Discover the secrets of photography with our printable guide! Master key techniques such as aperture, shutter speed, and ISO to create stunning images. Get your free printable PDF today and start turning your snapshots into masterpieces!
 Alveo Creative Blog Guiding users through techniques for enhancing images, retouching portraits, and mastering popular editing software


