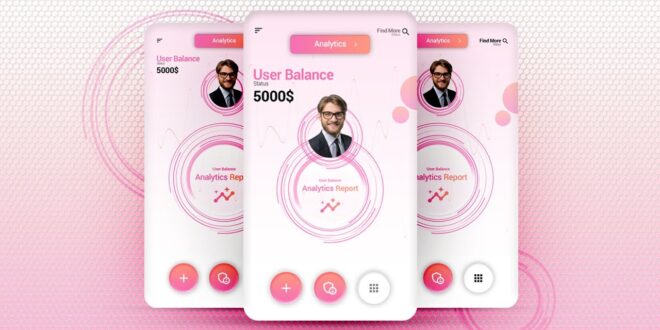
Ever stared at a blank screen , wishing you could magically conjure up the perfect app interface? Designing user interface elements in Photoshop is your secret weapon, my friend! Crafting killer UI isn’t about mystical powers , it’s about mastering the tools & techniques that bring your app vision to life. From crafting stunning buttons & icons to perfecting pixel-perfect layouts, this guide will unlock the secrets of Photoshop UI design for app development , turning your app dreams into a tangible reality. Think sleek, intuitive apps that users will adore – let’s get started!
Mastering App UI Design with Photoshop
Meta Description: Level up your app design skills! This guide shows you how to create stunning App UI using Photoshop. Learn essential techniques, tips & tricks for a polished, user-friendly interface. Get started now!
Hey there, fellow designers! Let’s dive into the world of crafting amazing app UIs using Photoshop. I’ve been working in UI design for years, and trust me, Photoshop is a powerhouse. This isn’t just another tutorial; it’s a friendly chat about making your app interfaces shine.
Why Photoshop for App UI Design?
Related Post : How To Create Engaging Social Media Posts Using Photoshop For Businesses
Photoshop’s reputation precedes it, right? But why is it still a go-to for App UI Design? Let’s break it down.
Photoshop’s Powerful Features for UI/UX Professionals
Photoshop isn’t just for photos anymore! It boasts a treasure trove of tools perfect for UI/UX professionals. Think pixel-perfect precision, advanced layer management, non-destructive editing—all crucial for crafting sleek, responsive app interfaces. You can create realistic mockups, refine your UI designs to the tiniest detail, and smoothly integrate your work with developer handoffs. It’s the ultimate toolbox for UI Design.
Beyond the Basics: Advanced Photoshop Techniques for App Design
Beyond the basics, Photoshop offers a whole world of advanced features tailored to App UI design. Smart Objects let you easily update elements without sacrificing quality. Layer Styles add depth and visual interest with minimal effort. Mastering these will elevate your UI Design game significantly.
Integrating Photoshop with Other Design Tools for a Seamless Workflow
Now, let’s be realistic. Photoshop rarely works in complete isolation. Many designers integrate it with tools like Figma, Sketch, or Adobe XD for a smoother workflow. For example, I often use Figma for initial wireframing and prototyping, then bring the refined designs into Photoshop for pixel-perfect polishing and mockup creation. This combined approach allows you to leverage the strengths of each tool for optimal efficiency. Finding the right combination really depends on your personal preference and the complexity of your project.
Essential Steps in Designing an App UI in Photoshop
So, you’re ready to create? Fantastic! Let’s break down the process step-by-step.
Planning Your App UI: Wireframing and Prototyping
Before diving into the pretty visuals, sketch out your app’s structure. Wireframes help define the layout and functionality. Tools within Photoshop or external prototyping software can help create interactive prototypes to test your UI’s flow. This initial planning phase is crucial; it saves you tons of time later on. Think of it as building a solid foundation for a skyscraper – you can’t have a beautiful exterior without a strong structure beneath.
Creating the Visual Design: Color Palettes, Typography, and Iconography
This is where your creativity shines! Choose a color palette that aligns with your app’s brand and target audience. Select typography that’s both legible and aesthetically pleasing. Consistent iconography enhances usability and contributes to a cohesive design. Remember, consistency is key; a unified visual language makes your app feel polished and professional.
Designing Individual UI Elements: Buttons, Navigation Bars, and More
Let’s get granular. Each UI element—buttons, navigation bars, input fields—needs careful consideration. Ensure they’re not just visually appealing but also intuitive and accessible. Think about size, spacing, and interactive states (hover, pressed). This is where Photoshop’s precision tools truly shine, allowing you to perfect every pixel.
Mastering Layers and Layer Styles for Efficiency
This is where Photoshop’s power truly shines! Organize your design using layers. This lets you easily edit individual elements without affecting others. Layer Styles add shadows, glows, and other effects, giving your UI depth and visual interest—all non-destructively, which means you can always go back and tweak things later.
Exporting Your App UI Assets for Developers
Once you’ve finished your masterpiece, it’s time to prepare the assets for developers. Export your elements as properly sized and formatted images (PNGs are usually best for UI elements) for seamless integration into the app. Accurate naming conventions and a well-organized file structure make the handover process much smoother. Trust me on this one; good organization here saves everyone headaches down the line.
Advanced Techniques for Polished App UI Design
Ready to take your App UI design to the next level?
Utilizing Smart Objects for Easy Editing
Smart Objects are a game-changer. They allow you to edit a single element and have the changes automatically reflect everywhere that element is used. This is particularly helpful for things like logos or recurring design elements. It’s like magic, but it’s just smart Photoshop usage!
Creating Realistic Mockups using Photoshop
Realistic mockups show your App UI in context, making it easier to visualize how it will look on different devices. Photoshop has the tools to create shadows, reflections, and other effects that make your mockups look incredibly lifelike.
Implementing UI Design Trends: Best Practices and Current Styles
Staying updated with current UI/UX trends is crucial. Look at successful apps and analyze their design choices. Explore resources like Dribbble and Behance for inspiration, but remember to focus on usability and functionality above all else. Trends come and go, but good design principles remain timeless.
Tips and Tricks for Efficient App UI Design in Photoshop
Let’s discuss some time-saving strategies I’ve learned along the way.
- Keyboard Shortcuts: Learn them! Seriously, they’ll speed up your workflow immensely.
- Using Actions to Automate Repetitive Tasks: Photoshop Actions let you record and replay sequences of steps, automating repetitive tasks. Think of it as creating your own mini-programs within Photoshop.
- Organizing Your Photoshop Files: A well-organized file structure is essential for large projects. Use folders and clear naming conventions to easily find what you need.
FAQ
Q: Can I use other software alongside Photoshop for App UI design?
A: Absolutely! Many designers use Figma, Sketch, or Adobe XD alongside Photoshop for various stages of the design process. It’s all about finding the workflow that best suits you.
Q: What are the best resources for learning more about App UI Design?
A: Online courses (like those on Udemy or Coursera), tutorials on YouTube, and design blogs are excellent resources. Don’t be afraid to explore and find what resonates with your learning style.
Conclusion
Mastering App UI design with Photoshop is a journey, not a sprint. By consistently practicing the techniques and tips outlined in this guide and staying curious, you’ll be creating stunning and user-friendly app interfaces in no time. Remember, the best UI is intuitive, beautiful, and perfectly serves the user’s needs. Now go forth and create! Let me know in the comments what you find most challenging about App UI Design – I’m always happy to help!
 Alveo Creative Blog Guiding users through techniques for enhancing images, retouching portraits, and mastering popular editing software


