 Alveo Creative Blog Guiding users through techniques for enhancing images, retouching portraits, and mastering popular editing software
Step By Step Process For Creating Animated Text Effects In Photoshop – In this tutorial we will use Adobe Photoshop to create a VHS style animated text effect intro for YouTube.
In this tutorial, we’ll create a VHS-style 3D Photoshop effect for text layers using smart filters, gradient fills, and video overlays.
Step By Step Process For Creating Animated Text Effects In Photoshop
You can find many Photoshop text actions in Graphics River, and if you want to create this 3D text effect in just a few simple clicks, check out my animated VHS text effect action made just like that.
How To Make A Heatmap Text Effect In Photoshop — Medialoot
Once you’re done with this tutorial, check out this guide for ten ways to optimize your final product for web use:
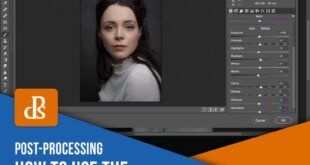
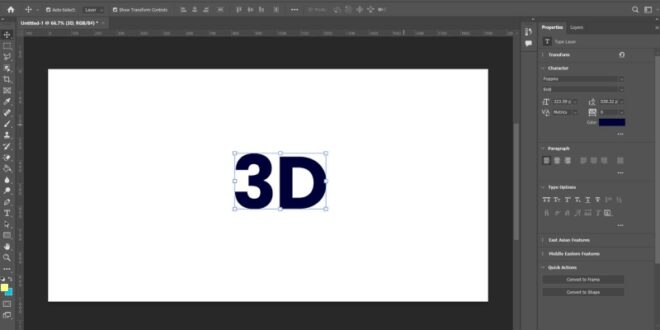
Click T to open the Horizontal Type tool and create any text with a size of 84 pt using the Bebas New font. After that, close the placeholder and save.
Now let’s start creating our text effects. Select the “Text” layer and then go to Filter > Blur > Gaussian Blur and set the Radius to 2 px.
Now we need to create layer style effects. Double click the layer and then go to the gradient layer.
3d Rotating Cylinder Text In After Effects
After that, you need to add a Gaussian Blur and Wave effect to the “Glow” layer with the same parameters.
Double click the layer and add an outer glow effect with the same gradient as we used before and the following settings:
Now we need to create structures that cover the “television lines”. Create a new layer with Shift-Control-N and fill it
Go to File > Location and then select the MP4 file from this tutorial attachment. Scale it and rotate it to the document’s borders.
How To Prep Photoshop Files For After Effects
Now we need to create a gradient overlay for our video. Go to Layer > New Fill Layer > Gradient and create two gradients. Name them “Light Letter 01” and “Light Letter 02”.
Now we are ready to create our animation. Go to Window > Timeline and click Create Video Timeline.
Now you need to create the first keyframe. Select the “Text” layer and click on the timer icon next to Transform to create the first keyframe.
Select the “Late Lakes 01” layer in the Timeline panel and start Clip Size: 02:00 and Duration: 02:00.
How To Create A Wicked Movie Logo In Photoshop
Select the “Late Lakes 02” layer in the Timeline panel and reduce the clip size to Start: 03:00 and Duration: 02:00.
After that, you need to apply the same transition with the same duration to the second “light line” layer.
Your video is ready! In this way, we can create VHS text effects using smart objects, gradient fills, filters and video overlays in Adobe Photoshop.
I hope you enjoyed this tutorial, and if you want to create this effect using Photoshop actions, you can check out my animated VHS text effect action in Graphics River, which will Help you create this text effect with a few simple clicks. Animations are a great way to enhance your videos or web pages. But creating them doesn’t have to be complicated! Follow along and see how easy it is to use basic images and icons to create your own stunning frame animations in Photoshop.
Photoshop Tutorial: 7 Simple Text Effects For Beginners (part 1)
Learn how to cut objects from their backgrounds, create realistic shadows, quickly change the color of images, and use the Frame Animation timeline in Photoshop to bring a simple scene to life.
When most people think of creating animations, Photoshop is not the first program that comes to mind. While Adobe Premiere and Adobe After Effects may be the most powerful tools overall, Photoshop is still the most capable option for adding basic animation to an image. So if you’re comfortable using Photoshop and in the market for some simple animations, this is the guide for you!
If you want to learn After Effects a little more, we have a 2 part tutorial where we create some text and gradients in Photoshop and then use After Effects to add a nice animation!
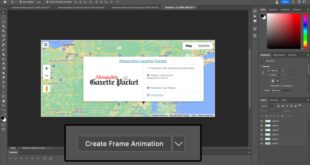
All the animation magic in Photoshop is made possible by the timeline. If you’re familiar with the basics of video and animation, you’ll know that a timeline is simply a display of how the various visual elements in a scene appear and change over a period of time. You can find the Timeline by clicking on the Window menu and then the Timeline option.
2d Animation: How To Easily Create An Animated Video For Beginners
There is a video timeline, which is great for more fluid and dynamic movement and more complex scenes. Then there’s the Frame Animation Timeline that works like a slideshow, allowing you to create multiple frames and stitch them together. The frame animation timeline is a little easier to use, so that’s what we’ll look at today.
Frame animations are very easy to use. When you first create a frame animation, it starts with just one frame that everyone in your Photoshop project can see.
If you create a second frame, everyone in the project will see it. But each frame can be changed and edited independently.
Say, for example, you have a line of text that says “I love you” as the first frame in your timeline. Then you create a second frame and then move this text on top. When you play the animation, you first see the text, then you see it scroll up, and then back.
How To Create An Advanced Photoshop Animation — Smashing Magazine
Here you can see a 2 frame animation where each letter rotates a bit. It’s easy to do and makes an effective move!
And there is no limit to the number of frames you can make! By combining multiple frames with simple transitions into one image, you can create fun and smooth animations perfect for websites, ads, or video title cards. You can also set the duration of each frame in Photoshop, giving you more control over the speed and feel of your animations.
Animation and transformation tools should be your go-to for creating basic animations. You can scale objects, rotate objects, or move objects across the canvas for different effects. In our example, we added a slight rotation to each letter within a few frames, added a slight rotation to the star images within a few frames, and moved the rocket icon slightly over the frames, as if it were flying around. From the canvas.
These tools make it easy to create animations using basic elements like text, shapes, and icons. It helps to isolate each element, so you can make sure each piece is on its own layer.
Photoshop Animation Techniques (redux, Creative Cloud)
In our example, we have an image of letter tiles. So we need to cut the tiles from their background.
And then put each individual letter on its own layer. This allowed us to adjust each element individually to create a more stylish animation.
You may need to cut out some objects from their background or duplicate the layer several times, but this is relatively easy to do and will make the final animation more dynamic. If you need to learn how to crop objects and remove backgrounds in Photoshop, check out our PRO course, How to Crop and Remove Backgrounds in Photoshop
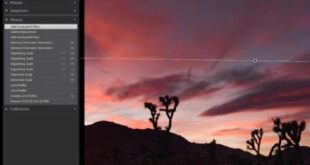
Once all the frames are set, it’s time to export your animation. There are several ways to do this depending on what type of file you want and where you want to display it. If it’s going to be on a website, a GIF is probably the best way to go. Go to File, Export, Save for Web (Legacy), and select GIF from the drop-down at the top right of the dialog.
How To Create A Montage In After Effects
If you want to use it as a title card in a video or if you want to upload it to a platform like YouTube, you’ll probably want to save it as an MP4. To do this, go to File, Export, Render Video, and select MP4 while adjusting the settings to your preference.