Ever opened a massive Photoshop file only to watch your computer chug along like a rusty tractor, threatening to crash & burn? Yeah, we’ve all been there. Managing large files in Photoshop is a major headache – a potential disaster waiting to happen, especially if you’re dealing with high-resolution images, layered PSDs, or extensive edits. But what if I told you there are ways to tame these digital behemoths & prevent those dreaded freezes? This guide’s packed with best practices for working with big files in Photoshop, helping you keep your workflow smooth, your computer happy, & your sanity intact. Let’s dive in!
Prevent Photoshop Crashes with Large Files
Meta Description: Photoshop crashing with large files? Learn proven techniques to prevent crashes, optimize your workflow, and save your precious work! Discover essential tips & tricks for smoother editing. #photoshop #largefiles #crashprevention
Hey there, fellow Photoshop enthusiast! Let’s be honest, working with large files in Photoshop can be a thrilling, yet terrifying experience. That heart-stopping moment when the spinning wheel of death appears after hours of meticulous work? Yeah, we’ve all been there. This comprehensive guide is your lifeline, packed with practical strategies to prevent Photoshop crashes and keep your creative flow unhindered.
Understanding Why Photoshop Crashes with Large Files
Related Post : How To Create Engaging Social Media Posts Using Photoshop For Businesses
So, what’s the deal with large files and Photoshop crashes? It boils down to a few key culprits:
Memory Management in Photoshop
Photoshop is a memory hog. Think of it like a hungry beast; the larger the file, the more RAM it demands. If your system runs out of available memory, Photoshop will start using your hard drive as virtual memory, which is significantly slower. This slowdown causes lag, freezes, and ultimately, the dreaded crash.
File Format and Compression Issues
Not all file formats are created equal. Uncompressed formats like PSD and TIFF require significantly more memory than compressed formats like JPEG. Choosing the wrong format can greatly increase the risk of crashing, especially with very large images. Furthermore, poor compression can lead to bloated file sizes and performance issues.
Plugin Conflicts and System Resources
Plugins, while offering incredible functionality, can sometimes clash with Photoshop or consume excessive system resources. A poorly coded plugin or too many plugins running simultaneously can strain your system and contribute to instability, leading to crashes when working with demanding large files.
Proactive Strategies to Prevent Photoshop Crashes
Prevention is always better than cure, right? Let’s explore some proactive strategies to keep your Photoshop sessions crash-free.
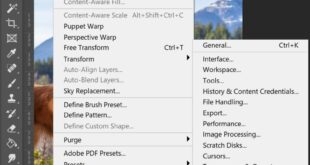
Optimize Your Photoshop Settings
This is crucial! Let’s look at some key settings:
| Setting | Impact | Recommendation |
|——————————|—————————————————————————–|——————————————————————————|
| Memory Allocation | Determines how much RAM Photoshop can use. | Allocate at least 70% of your total RAM, or even more for extremely large files. |
| Scratch Disks | Specifies hard drives used for temporary storage. | Use fast SSDs (Solid State Drives) as scratch disks for optimal performance. |
| History States | Controls the number of undo steps Photoshop remembers. | Reduce the number of history states to free up memory, especially for large files.|
Utilize Non-Destructive Editing Techniques
These techniques are your best friends when dealing with large files:
- Smart Objects: Treat layers as containers, preserving original quality even after transformations and edits.
- Adjustment Layers: Apply non-destructive edits that can be easily modified or removed without affecting the base image.
- Layer Masks: Precisely control edits without permanently altering pixels.
Efficient File Management
- Save As: Regularly save your work with different filenames to create backups.
- Version Control: Utilize Photoshop’s version history or cloud-based solutions like Creative Cloud to manage file versions.
- File Organization: A well-organized file system makes locating files quick and easy. Avoid clutter!
Regular System Maintenance
- Disk Cleanup: Regularly clear temporary files and unnecessary data to free up disk space.
- Software Updates: Keep your operating system and Photoshop updated to benefit from bug fixes and performance enhancements.
Hardware Upgrades
1. RAM: Increasing your RAM is often the most effective way to prevent crashes when working with large files. More RAM means more space for Photoshop to work.
2. SSD: Switching to a solid-state drive significantly improves loading times and overall system responsiveness.
Reactive Strategies: What to Do When a Crash Happens
Despite your best efforts, a crash might still occur. Here’s what to do:
The Importance of Auto-Recovery
Enable Photoshop’s auto-recovery feature! This automatically saves your work at regular intervals, minimizing data loss in case of a crash.
Recovering Unsaved Work
Photoshop sometimes creates temporary files. Check your system’s temporary files folder (usually located in %temp% on Windows or /tmp on macOS).
Preventing Future Crashes After a Crash
After a crash, analyze what happened. Did you run out of memory? Was a specific plugin involved? Address the root cause to prevent future crashes.
Choosing the Right File Format for Large Files
The choice of file format significantly impacts file size and Photoshop’s performance.
Advantages of PSD vs. TIFF vs. JPEG
- PSD: Photoshop’s native format, preserving layers and edits. Large file size.
- TIFF: Lossless format suitable for high-quality images, but also large file size.
- JPEG: Lossy compression, significantly smaller file size but some data loss.
Understanding File Compression and Its Impact
Lossy compression (like JPEG) discards data to reduce file size, while lossless compression (like TIFF) preserves all data. Choose wisely based on the need for image quality versus file size.
A Personal Anecdote: I once lost nearly 10 hours of work on a massive panorama project because I hadn’t optimized my Photoshop settings. It was devastating. That’s why I’m so passionate about sharing these tips—to prevent others from experiencing the same heartbreak!
FAQ
Q: My computer freezes when I open a large Photoshop file. What can I do?
A: This often indicates insufficient RAM. Try increasing the RAM allocated to Photoshop in its preferences, using a faster SSD, or closing unnecessary applications.
Q: Photoshop crashes frequently, even with smaller files. What could be the problem?
A: This suggests a broader issue, possibly a plugin conflict, corrupted preferences, or a problem with your operating system. Try reinstalling Photoshop, updating your drivers, or running a disk check.
Conclusion
Mastering large files in Photoshop doesn’t have to be a stressful experience. By implementing these preventative measures and understanding the underlying causes of crashes, you’ll significantly reduce the risk of losing work and enjoy a smoother, more efficient workflow. Don’t wait until a crash happens—start optimizing your Photoshop experience today!
 Alveo Creative Blog Guiding users through techniques for enhancing images, retouching portraits, and mastering popular editing software


