Ever wished your photos had that extra oomph , that certain je ne sais quoi? Maybe a sprinkle of magic, a burst of dazzling brilliance? Adding sparkles & glitter to images in Photoshop is easier than you think! Forget those dull, flat pictures; let’s learn how to easily add shimmer, shine, & sparkle effects to your photos, transforming them from ordinary to extraordinary. Seriously, you’ll be amazed at how quickly you can boost the visual appeal of your images & create truly eye-catching results. Ready to dive in?
Dazzle Your Designs: Mastering Photoshop Glitter and Sparkles
Meta Description: Unleash your inner sparkle! Learn how to add stunning glitter and sparkles to your Photoshop designs. From subtle shimmer to dazzling effects, this guide has you covered! Get started now!
Hey there, design enthusiasts! Let’s talk glitter. Not the messy, craft-project kind, but the digital kind – the kind that adds a touch of magic to your Photoshop creations. Whether you’re sprucing up a logo, crafting a festive invitation, or adding some extra oomph to a product mockup, knowing how to add glitter and sparkles in Photoshop is a seriously useful skill. And trust me, it’s easier than you think!
Why Add Glitter and Sparkles in Photoshop?
Related Post : How To Create Engaging Social Media Posts Using Photoshop For Businesses
Why bother adding digital glitter, you ask? Well, let me tell you, it’s not just about making things shiny. It’s about elevating your designs to a whole new level.
- Elevating design aesthetics: A sprinkle of glitter can transform a simple design into something truly eye-catching. It adds a touch of luxury and sophistication, instantly enhancing the overall visual appeal.
- Adding a touch of magic and festivity: Glitter is synonymous with celebration! It’s perfect for adding that extra sparkle to holiday designs, birthday cards, or anything that needs a festive touch.
- Creating eye-catching visuals for social media: In the world of social media, standing out is crucial. Glitter and sparkle effects can help your designs grab attention and make a lasting impression. Think about those sparkly Instagram posts that always catch your eye!
- Enhancing product mockups and presentations: Adding a subtle shimmer to product mockups can make them look more appealing and luxurious, particularly for products marketed towards a younger demographic or those emphasizing fun and excitement.
Gathering Your Glitter Arsenal: Essential Resources
Before we dive into the techniques, let’s gather our tools. You’ll need a few key resources to create stunning glitter effects in Photoshop.
- High-quality glitter brushes: These are your secret weapon! You can find tons of amazing free and paid glitter brushes online. I personally love browsing [insert link to a reputable resource for brushes here] and [insert link to another resource]. Look for brushes with varying sizes and densities to give you lots of creative options. Think about subtle shimmer brushes for a delicate touch, and more intense glitter brushes for a bolder look.
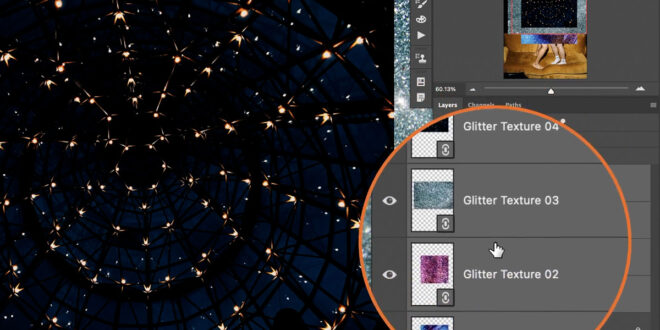
- Glitter textures: Textures offer a different approach – providing a more realistic glitter effect. They’re like pre-made glitter overlays that you can seamlessly blend into your design. You can find a huge variety of glitter textures on sites like [insert link to a resource for textures here]. Experiment with different colors and textures to achieve the perfect look.
- Custom-made glitter overlays: Feeling adventurous? Create your own unique glitter overlays! You can do this by using shapes, layer styles, and blending modes to craft the perfect sparkle. This gives you ultimate control and allows for completely unique glittery elements.
Step-by-Step Guide: Adding Glitter and Sparkles in Photoshop
Let’s get practical! Here’s a breakdown of the most common methods for adding glitter to your Photoshop projects. Remember, the best method depends on the effect you want to achieve.
| Method | Description | Pros | Cons |
|———————-|————————————————————————————————————|———————————————————————-|—————————————————————————–|
| Using Glitter Brushes | Apply pre-made brushes for a quick and easy glitter effect. Simply select your brush, choose a color, and paint! | Fast, simple, many options available, excellent for quick design updates. | Can look artificial if overused; requires careful brush selection and placement.|
| Applying Glitter Textures | Overlay textures for a more realistic glitter effect. Adjust opacity and blending modes for fine-tuning. | More realistic look, versatile application, easily layered. | Requires careful blending and adjustment; might need masking for precise placement.|
| Creating Custom Glitter | Design your own unique glitter using layer styles, blending modes (like Overlay or Screen), and custom shapes. | Unique and highly customizable; perfect for achieving very specific glitter looks.| More time-consuming, requires stronger Photoshop skills. |
(Include Screenshots of each method here – one for each row in the table. Show the before and after of each technique.)
Advanced Techniques: Beyond Basic Sparkles
Once you’ve mastered the basics, it’s time to explore some advanced techniques!
- Creating realistic glitter using layer masks: Layer masks are your friend! They allow for precise control over where your glitter appears, creating a more natural and realistic look.
- Blending modes for enhancing glitter effects: Experiment with different blending modes like Overlay, Screen, Soft Light, and Hard Light to achieve various glitter effects. Each mode interacts with the underlying image differently, creating unique results.
- Adding subtle shimmer to photos: Don’t go overboard! Sometimes, a touch of subtle shimmer is all you need to add a touch of magic to a photograph. Use low-opacity glitter brushes or textures for a delicate, realistic glow.
- Creating glowing effects with glitter elements: Combine glitter with other effects like glows and light rays to create truly stunning, magical designs. Think fairy lights, fireworks, or sparkling stars.
Troubleshooting Common Issues
Even seasoned Photoshop users encounter challenges. Here are some common issues and how to fix them:
- Glitter looking too pixelated: This usually happens when using low-resolution brushes or textures. Always use high-resolution assets for the best results.
- Glitter blending poorly with the image: Experiment with different blending modes and adjust the opacity of your glitter layer. A layer mask can also help you blend the glitter seamlessly into the image.
- Achieving the right level of sparkle: It’s all about balance! Start with a subtle amount of glitter and gradually increase it until you achieve the desired effect. Too much glitter can overwhelm your design.
Personal Anecdote: My Glitter Journey
Remember that first time I tried adding glitter to a design? It was a disaster! I went overboard, using a massive, low-resolution glitter brush, and it looked completely unnatural. It was a harsh lesson learned. But through trial and error, I figured out the secrets to creating subtle, elegant glitter effects that enhance a design rather than overpower it. The key is restraint and using the right tools.
FAQ Section:
- Q: What kind of Photoshop version do I need for these techniques?
- A: Most versions of Photoshop (CS6 and above) will work, although some features might vary slightly. The core techniques remain largely consistent.
- Q: Where can I find free glitter brushes and textures?
- A: Many websites offer free resources; I recommend searching on DeviantArt, Brusheezy, and Creative Market (they often have free options).
- Q: How can I make my glitter look more realistic?
- A: Experiment with blending modes, layer masks, and adjusting the opacity of your glitter layers. Using high-resolution textures and brushes also makes a big difference.
Conclusion:
Adding glitter and sparkles in Photoshop is a fun and effective way to elevate your designs. With a little practice and the right techniques – plus a touch of creativity – you can create stunning visuals that capture attention and leave a lasting impression. So, grab those brushes, explore textures, and start dazzling your designs today! Share your creations with us using #PhotoshopGlitter!
 Alveo Creative Blog Guiding users through techniques for enhancing images, retouching portraits, and mastering popular editing software


