Ever stared at a website , feeling like something’s missing? Like it needs that extra oomph to really grab you? Well, a dynamic background in Photoshop might just be the answer! Creating captivating, moving backgrounds isn’t rocket science, even if it looks like it sometimes. Learning how to craft these animated masterpieces can completely transform your web design, boosting engagement & making your site unforgettable. Forget static images; let’s dive into the exciting world of Photoshop & discover how to build dynamic backgrounds that truly shine online. Ready to level up your web design game?
Mastering Backgrounds in Photoshop for Stunning Web Design
Tired of boring website backgrounds holding back your designs? Let’s face it, a well-designed background isn’t just a pretty picture; it’s the foundation of a compelling online experience. It sets the mood, complements your content, and ultimately, impacts how users perceive your brand. And Photoshop? It’s the ultimate tool to craft those captivating backgrounds, transforming your web design game. In this guide, we’ll explore how to create dynamic backgrounds in Photoshop for web design, from basic techniques to advanced tricks. Get ready to level up your web design skills!
Choosing the Right Background for Your Web Design
Before diving into Photoshop, let’s talk strategy. Choosing the right type of background is crucial for your overall web design. The wrong background can clash with your content, making your website look amateurish. Let’s explore the different options:
Related Post : How To Create Engaging Social Media Posts Using Photoshop For Businesses
Image Backgrounds: The Visual Powerhouse
Image backgrounds offer a huge range of possibilities. You can use stunning photographs, illustrative art, or even abstract designs. However, there are considerations:
- File Types: JPEGs are great for photographic backgrounds due to their smaller file sizes. PNGs are better for images with transparency (like logos overlaid on a background).
- Resolution: Aim for high-resolution images to prevent pixelation. Low-resolution images will look blurry, especially on high-resolution screens.
- Sourcing: Finding high-quality images requires careful consideration. Stock photo websites like Unsplash, Pexels, and Pixabay offer fantastic free options. Always check the license to ensure you’re legally using the images.
Remember that time I used a low-res image for a client’s website? The result was disastrous. The background looked blurry and unprofessional – a costly lesson learned!
Color Backgrounds: Simplicity and Elegance
Sometimes, the most impactful backgrounds are the simplest. Solid color backgrounds provide a clean, uncluttered look, allowing your content to take center stage. Here’s how to leverage them:
- Solid Colors: Easily created in Photoshop by filling a layer with a single color.
- Gradients: Create a smooth transition between two or more colors for a more dynamic feel. Experiment with different gradient types (linear, radial, angular) to achieve various effects.
- Color Palettes: Use a consistent color palette based on your brand guidelines to maintain visual harmony across your website.
Pro Tip: Use a color picker tool to ensure color consistency between your background and other website elements.
Pattern Backgrounds: Adding Texture and Visual Interest
Repeating patterns add a subtle yet stylish touch to your website backgrounds. They can be geometric, floral, or abstract—the possibilities are endless!
- Creating Patterns: Photoshop allows you to create your own custom patterns. Simply create a small tile and then define it as a pattern.
- Using Pre-made Patterns: Numerous websites offer free and paid pattern downloads. Websites like Creative Market or Etsy are good places to look.
I once used a subtle geometric pattern as a background for a blog, and it added a level of sophistication that a plain color couldn’t match.
Textured Backgrounds: Depth and Realism
Textured backgrounds add a sense of depth and realism to your web designs. They can range from subtle canvas textures to more pronounced concrete or wood grain effects.
- Creating Textures: You can create textures in Photoshop by experimenting with brushes, filters, and blending modes.
- Using Pre-made Textures: Many websites offer free and paid texture downloads. Look for high-resolution textures to ensure quality.
Remember to use textures sparingly. An overly textured background can distract from your content.
Photoshop Skills for Background Mastery
Now that we’ve chosen our background type, let’s explore the core Photoshop techniques needed for creation and manipulation:
Using Layer Styles: Adding Depth and Dimension
Layer styles are your secret weapon for adding depth and dimension to backgrounds. They allow you to apply effects like drop shadows, bevels, and embossing without altering the original layer. Experiment with different settings to achieve unique looks!
Blending Modes: Controlling Layer Interactions
Blending modes dictate how layers interact with each other. Experimenting with different blending modes can drastically alter the appearance of your background, creating unique and unexpected effects. ‘Soft Light’, ‘Overlay’, and ‘Multiply’ are great places to start.
Masking and Selection Tools: Precise Background Editing
The Lasso, Pen, and Quick Selection tools are your allies for precise background edits. Masking allows you to selectively hide or reveal portions of a layer, giving you complete control over your background’s appearance.
Working with Adjustment Layers: Non-Destructive Editing
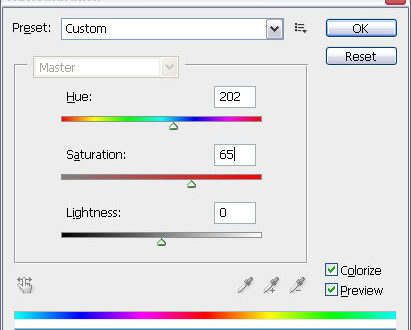
Adjustment layers (Brightness/Contrast, Hue/Saturation, Levels, Curves) provide non-destructive editing. This means you can adjust the background’s colors and tones without permanently altering the original image. This is crucial for flexibility and ease of experimentation.
Seamless Background Integration
Creating a stunning background is only half the battle. The other half is successfully integrating it into your web design:
Optimizing Images for Web: Speed and Efficiency
Optimizing images is critical for fast loading times. Use tools within Photoshop (Save for Web) to compress images without significant quality loss. Reducing file size will enhance the user experience.
Choosing the Right File Format: Transparency and Quality
PNGs are ideal for images with transparency, while JPEGs are better suited for photographs. The correct file format ensures your background looks its best while maintaining a small file size.
Responsiveness and Scalability: Adapting to Different Screens
Your background should look great on all devices, from desktops to smartphones. Design backgrounds that scale appropriately without distortion or pixelation. This often involves creating multiple versions of your background at different resolutions.
Taking Your Backgrounds to the Next Level
Once you’ve mastered the basics, explore these advanced techniques:
Creating Realistic Effects: Photo Manipulation and Beyond
Photoshop allows for incredible realism. Learn advanced techniques like creating realistic textures or manipulating photos to craft incredibly detailed backgrounds.
Using Actions and Presets: Streamlining Your Workflow
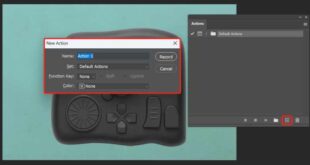
Photoshop Actions and Presets automate repetitive tasks, saving you valuable time and increasing your efficiency. Learn to create and use your own custom actions and presets.
Quick Reference Guide to Photoshop Background Techniques
| Technique | Description | Best Use Case |
|———————-|———————————————-|————————————————-|
| Layer Styles | Add effects like shadows and bevels | Enhancing simple backgrounds |
| Blending Modes | Change how layers interact | Creating unique background effects |
| Masking | Precisely edit parts of a background | Isolating elements within a complex background |
| Adjustment Layers | Non-destructively adjust colors and tones | Fine-tuning background colors and contrast |
Elevate Your Web Designs with Stunning Backgrounds
Mastering Photoshop backgrounds is a journey, not a destination. Experiment with different techniques, styles, and approaches. The more you practice, the more creative and effective your backgrounds will become. Don’t be afraid to push your creative boundaries! Start creating stunning backgrounds today! Share your work and tag us @[Social Media Handle].
FAQ
Q: What is the ideal resolution for web backgrounds?
A: The ideal resolution depends on the size of your website elements. Aim for high-resolution images to prevent pixelation, but also consider file size optimization for faster loading times.
Q: Which file format is best for web backgrounds?
A: PNGs are best for images with transparency, while JPEGs are better for photographs. Consider the specific needs of your background when choosing a file format.
Q: How can I make sure my background looks good on all devices?
A: Create responsive backgrounds that scale appropriately for different screen sizes. Use flexible layout techniques and optimize images for various resolutions.
Q: Where can I find free, high-quality background images?
A: Unsplash, Pexels, and Pixabay are excellent resources for free, high-quality background images. Always double-check the license before using them in your projects.
 Alveo Creative Blog Guiding users through techniques for enhancing images, retouching portraits, and mastering popular editing software


