Ever stared at a photo , wishing you could magically pluck out that distracting branch or perfectly isolate your subject? You’re not alone! Mastering advanced selection techniques in Photoshop isn’t about becoming a pixel-pushing wizard , it’s about unlocking your photos’ true potential. This guide will walk you through powerful selection tools like the lasso , quick selection , and refined masking – techniques that’ll transform your image editing & breathe new life into your pictures. Want to create stunning product shots , flawless portraits , or just ditch those pesky imperfections? Let’s dive into the world of precise selections & discover how you can make your photos absolutely pop!
Meta Description: Unlock the secrets to professional photo editing! Learn essential Photoshop selection techniques for precise image enhancement. Master quick selections, refine edges, and achieve breathtaking results. Get started now!
Unlocking the Power of Photoshop Selections for Stunning Photo Enhancement
Hey there, fellow photography lovers! Let’s talk Photoshop. More specifically, let’s talk about selection techniques, the secret weapon of any serious photo editor. Whether you’re just starting out or you’ve been wrestling with layers and masks for years, mastering selection is key to taking your photo enhancement game to the next level. Think of it as learning the building blocks of photo manipulation magic! We’ll cover everything from the basics to some seriously slick advanced moves. Ready? Let’s dive in!
Mastering Basic Selection Tools in Photoshop
Related Post : How To Create Engaging Social Media Posts Using Photoshop For Businesses
Before we get to the fancy stuff, let’s nail down the fundamentals. These basic selection tools are your everyday workhorses—get comfy with them and you’ll be amazed at what you can do.
The Quick Selection Tool: A Speedy Selection
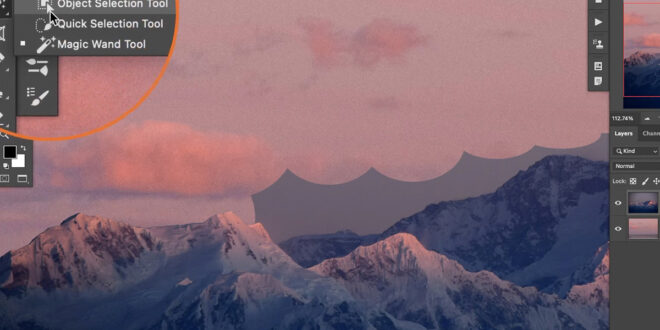
The Quick Selection Tool is your go-to for fast, broad selections. Think of it as a lasso on steroids—it intelligently “guesses” what you want to select based on similar colors and tones. It’s brilliant for grabbing large areas quickly, but be aware it can sometimes get a little… enthusiastic!
[Insert GIF demonstrating Quick Selection Tool usage here]Limitations: It struggles with fine details, complex edges, and areas with significant color variation. It’s great for a first pass, but refining is often necessary.
The Magic Wand Tool: Selective Color Magic
This tool selects areas of similar color based on a tolerance level you set. Click once on an area, and whoosh—it selects everything of a similar hue. It’s super handy for selecting backgrounds with uniform colors or isolating objects with distinct colors.
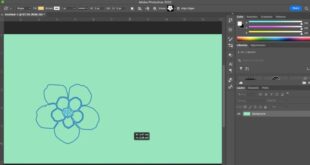
[Insert Before & After image showing Magic Wand Tool use here – perhaps selecting a brightly colored flower against a plain background]Best Use Cases: Isolating objects with distinct colors, quickly selecting large areas of similar tones in a photo.
The Lasso Tools (Polygonal, Magnetic, Freehand): Precision Powerhouses
Now, for some more precise control. The Lasso tools are your best friends for intricate selections.
| Tool | Description | Best For |
|—————|———————————————————|——————————————————|
| Polygonal Lasso | Creates straight-edged selections with precise clicks. | Selecting objects with sharp, defined edges. |
| Magnetic Lasso | Snaps to edges as you trace; great for complex outlines. | Selecting objects with irregular but well-defined edges.|
| Freehand Lasso | Allows for freeform selections with a mouse or stylus. | Selecting objects with highly irregular or organic shapes.|
Refining Your Selections for Pixel-Perfect Accuracy in Photoshop
Even the best initial selections need a little polish. This is where the real artistry happens!
Refining Edge: The Detail Doctor
The Refine Edge tool is your secret weapon for cleaning up messy selections. It allows you to fine-tune the edges of your selection, smoothing out jagged lines, removing halos, and generally making everything look pristine.
[Insert screenshots or short video tutorial of Refine Edge tool in action here. Show different settings and their effects]Using Masks for Non-Destructive Editing: A Gentle Approach
Masks are non-destructive editing’s best friend. They allow you to hide or reveal parts of a layer without permanently altering the image itself. Think of it like a stencil—you can always go back and adjust the mask without damaging the original.
- Advantages of Using Masks:
- Non-destructive editing: Always go back and adjust.
- Flexibility: Easily refine selections without starting over.
- Precise control: Achieve pixel-perfect results.
- Layer stacking: Build complex edits non-destructively.
Layer Masks vs. Vector Masks: Choosing Your Weapon
Both layer masks and vector masks offer non-destructive editing, but they have different strengths. Layer masks are raster-based and ideal for complex edits that need flexibility. Vector masks are path-based, perfect for sharp, geometric shapes.
Advanced Selection Techniques for Complex Images
Let’s level up! These techniques are perfect for tackling more complex photos.
Color Range Selection: Targeting Specific Hues
The Color Range selection tool lets you select areas based on their color values. It’s especially useful for isolating specific colors within a complex image, such as selecting all the blues in a landscape.
[Insert before and after comparison showcasing the Color Range Selection Tool]Subject Selection with AI: The Future is Now!
Newer versions of Photoshop boast AI-powered selection tools. These tools automatically detect and select the main subject of your image with incredible accuracy, dramatically speeding up your workflow.
[Insert short explainer video or GIF showing AI-powered selection tool in action]Putting it all Together: Practical Photo Enhancement Examples
Let’s see these techniques in action!
Use Case 1: Removing Blemishes from a Portrait: Use the Spot Healing Brush tool in conjunction with careful selection to remove blemishes without affecting the surrounding skin tones.
Use Case 2: Replacing a Background: Use the Quick Selection or Magnetic Lasso tools to select your subject, then refine the edge. Create a new layer with the desired background, and place your subject on top. Use layer masks to blend seamlessly.
Use Case 3: Creating a Composite Image: This is where things get really fun! Let’s say you want to combine a photo of a person with a stunning landscape background.
- Step 1: Carefully select your subject using the appropriate lasso tool (maybe even combining several for complex shapes).
- Step 2: Refine the edges using the Refine Edge tool, paying close attention to hair and other fine details.
- Step 3: Copy and paste your subject onto a new layer with your landscape background.
- Step 4: Use layer masks to carefully blend the subject with the new background, adjusting the opacity and feathering as needed.
Remember – practice is key. The more you experiment, the more comfortable you’ll become with these tools, and the more creative you’ll become with your photo editing.
Conclusion: Your Photo Enhancement Journey Begins Now!
Mastering Photoshop selection techniques is a journey, not a sprint. But armed with these skills, you’ll be able to transform your images into stunning works of art. So grab those photos, fire up Photoshop, and get creating! Share your amazing creations with us in the comments below – let’s see what you’ve got!
FAQ: Your Burning Questions Answered
Q: What is the best selection tool in Photoshop?
A: There’s no single “best” tool; it depends entirely on your image and what you’re trying to select.
Q: How can I improve my selection accuracy?
A: Practice makes perfect! Master the Refine Edge tool, and always use layer masks for non-destructive edits.
Q: Are there any keyboard shortcuts for selections?
A: Absolutely! Search online for “Photoshop selection shortcuts” to find a comprehensive list. They’re a lifesaver!
 Alveo Creative Blog Guiding users through techniques for enhancing images, retouching portraits, and mastering popular editing software


